Building a rocket in Infinity Craft takes patience. Yeah, plenty of players hit a wall and quit, I get it. But you don’t have to be one of them. I’ve been stuck there too, staring at a half-finished blueprint, wondering what I’m missing, what component I’d overlooked or what resource bottleneck was blocking my progress. The frustration’s real. It happens to everyone who pushes past the early game grind and realizes the late-stage recipes demand materials you haven’t even unlocked yet.
This guide is here to help you.
I’ve spent countless hours figuring out how to make a rocket in Infinity Craft. Every mistake you can think of? I’ve made it. Through trial and error, though, I’ve found a method that actually works.
This isn’t your standard tutorial. It’s a straightforward walkthrough that gets you from nothing to live in record time, and beginners find it accessible without feeling patronized. Veterans? They’ll find it useful too.
Gathering materials and resources
List of Required Materials:
First, figure out what you actually need. Rocket parts, fuel, and other essential components aren’t optional. Quality matters, don’t cut corners on these.
Resource Locations:
Finding these materials can be a bit of a scavenger hunt. One player told me, “I spent hours mining in the mountains, but it was worth it when I finally got that rare ore.” Mountains work. Caves too. Even surface areas if you know where to look. Keep your eyes peeled and your pickaxe ready, you’ll spot the good stuff once you start looking for it.
Crafting is another way to get what you need. If you can’t find it, make it.
Crafting Basics:
How do you craft the necessary components? Straightforward enough. One player nailed it: “Once I figured out how to make rocket in infinity craft, it totally changed everything for me.” Start by gathering raw materials, then set up your crafting table. From there, you just follow the recipes. Done.
Simple, right?
If you’re stuck, hit up the community forums. People there are usually pretty generous with their tips and tricks.
Designing your rocket
Choosing the right rocket design is crucial, and it can make or break your mission.
Single-Stage Rockets: These are simple and easy to build. They’re great for beginners. But, they have limited payload capacity and can’t reach high altitudes.
Multi-Stage Rockets: More complex but offer better performance. They can carry heavier payloads and reach higher altitudes. The downside?
They require more resources and skill to build.
Pro Tip: Start with a single-stage if you’re new. Move to multi-stage as you gain experience.
Blueprints and layouts are essential. They help you visualize and plan your build. Here’s a basic layout for a single-stage rocket:
- Nose Cone: Streamlines the rocket.
- Body Tube: Houses the engine and payload.
- Fins: Provide stability.
- Engine Mount: Holds the engine in place.
Multi-stage rockets stack engines on top of each other. Each stage has its own engine and igniter, firing in sequence as the rocket climbs higher. The first stage burns through its fuel, then drops away. Next, the second stage ignites and pushes higher still. Want even more thrust at different altitudes? Add another stage on top. This staged approach lets rockets reach altitudes and carry heavier payloads that a single-stage design simply can’t manage. By shedding weight as each stage burns out, you’re not hauling dead weight into the sky. That’s what makes the difference.
To build a rocket in Infinity Craft, the blueprint feature is your sandbox. Design and test your rocket before you commit any materials, experiment freely, tweak the design until something actually works. No waste, no regrets. Once the blueprint’s locked in, gather your resources and build the real thing.
Customization tips can really boost your rocket’s performance and aesthetics.
- Aerodynamics: Smooth surfaces and streamlined shapes reduce drag.
- Weight Distribution: Balance the weight for better stability.
- Color Schemes: Choose colors that stand out and look cool.
Pro Tip: Test different designs and configurations, and small tweaks can make a big difference.
Remember, the key is to start simple and gradually add complexity. Happy building!
Building the rocket
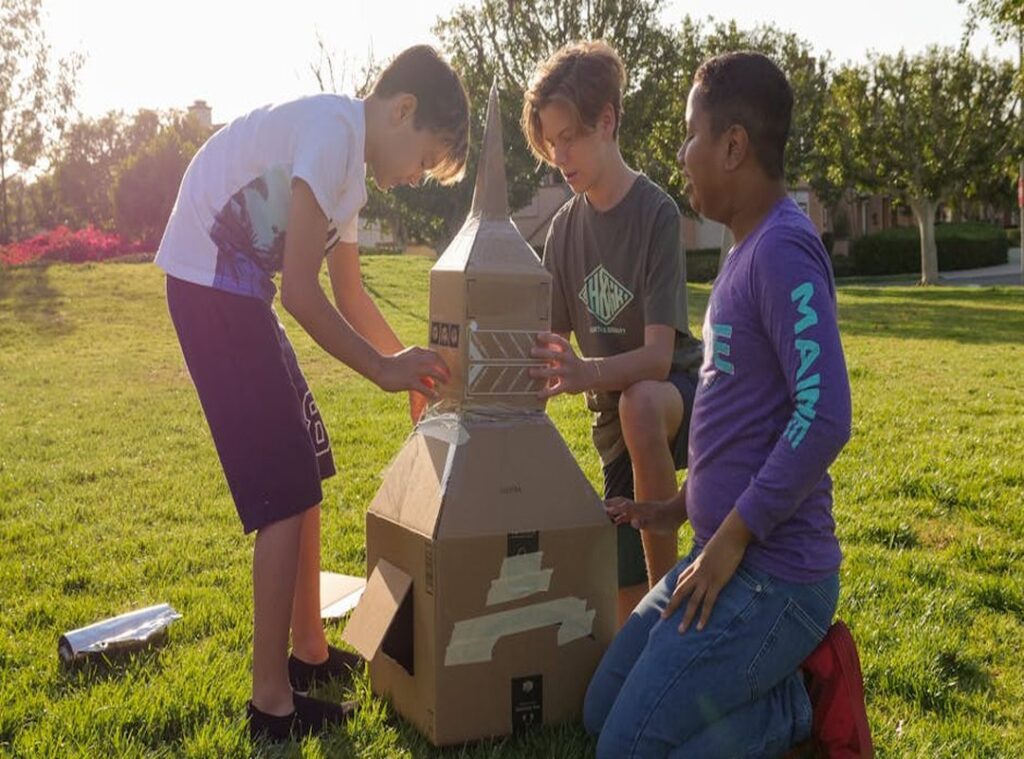
Making a rocket in Infinity Craft isn’t just about assembling pieces. It’s feeling the process, hearing those satisfying clicks, watching your creation come to life on screen. You’ll start with basic materials, metal scraps, a fuel chamber, some wiring, and then you combine them. See what happens. The game rewards experimentation, which means half the fun is figuring out what works through trial and error. Stack your components carefully because the rocket won’t launch itself. You’ve got to build the engine, attach the stabilizers, load the fuel. Each step matters, every connection gets you closer to liftoff. And that first successful launch? It’s the payoff for all the fumbling around beforehand.
Gather your materials first. You’ll need the base, the body, the fins, and the nose cone, have them all within reach before you begin assembling. Sounds simple, but it saves time later.
Step 2: Assemble the Base Start with the base. It’s the foundation of your rocket, and snap it into place.
You should hear a satisfying click.
Step 3: Attach the Body Next, attach the body to the base. This part can be a bit tricky, and align the edges carefully.
Step 4: Add the Fins Now, add the fins. They give your rocket stability, and press them firmly until they snap in.
Step 5: Install the Nose Cone Finally, install the nose cone. It’s the last piece, and make sure it fits snugly.
Assembly Tips: Start with a flat surface, wobbly tables are the enemy here. Keep your workspace clean, or you’ll lose parts in the mess. Follow the instructions. That’s it.
Sometimes, a quick glance at the manual can save you time.
Wobbly fins? Press ’em harder or tape ’em down. Nose cone stuck? There’s probably debris in there or something’s misaligned, clean it out and give it another shot. The body won’t snap in? Check that the base is lined up right. Sometimes you just need a tiny adjustment to make it click.
Building a rocket isn’t just assembly. It’s the feel of components fitting snug, that click when everything locks right, the quiet moment before you watch it blast off. There’s something about holding each piece, understanding how it all connects, that makes the final product mean more than any instruction manual could capture.
Fueling and preparing for launch
Rocket fuel comes in a few flavors. Kerosene and liquid hydrogen dominate the field, both packing serious efficiency and raw power. But that’s just the start.
Solid fuels, on the other hand, are simpler and more stable but less powerful.
Now, let’s talk about the fueling process, and safety is key here. You need to wear protective gear and work in a well-ventilated area.
Start by connecting the fuel lines to the rocket. Slowly fill the tanks while you monitor for leaks or other issues. It’s similar to filling up your car, except everything’s exponentially more dangerous. Really, the stakes couldn’t be higher when you’re handling propellant at this scale.
Before you launch, make sure to do some pre-launch checks. Verify that all connections are secure, and check the fuel levels and pressure.
Make sure the guidance systems are online and calibrated. It’s like making sure your smartphone storage management is in order before a big trip. You don’t want to be caught with a full storage and no room for new photos, right?
Finally, double-check the launch site. Clear away any debris and make sure the launch pad is stable. Everything needs to be exactly right, kind of like prepping a film set before the cameras roll.
If you build rockets, you’ve probably wondered about crafting them in Infinity Craft too. Actually doing it beats reading about it. The basics stick faster when your hands are involved, when you’re testing and iterating in real time instead of just absorbing theory. That’s the real difference.
Launching and containing the rocket
Launching a rocket in Infinity Craft takes more than just hitting a button. You’ll need to set up your launchpad first, and it’s got to be stable. Clear away any debris. That part matters.
Then, initiate the countdown sequence. It’s simple: type “LAUNCH” in the command bar.
Some players think you can just let the rocket go and hope for the best. WRONG, and you need to be hands-on.
Use the WASD keys to steer your rocket. Hit spacebar for a burst of speed, just don’t go crazy with it. Too much velocity and you’re done for.
Landing and recovery are often overlooked, and people assume it’s all about the launch. NOT TRUE.
As you descend, use the E key to deploy parachutes. This slows your descent and helps with a soft landing.
Start in a controlled setting. HOW TO MAKE ROCKET IN INFINITY CRAFT is perfect for this, it walks you through step-by-step instructions and gives you solid tips to actually get going, not just theory.
Remember, controlling a rocket isn’t just about getting off the ground. It’s about the entire journey. Stay focused, and you’ll have a successful mission.
Advanced techniques and tips
Advanced Designs: Your rocket’s a symphony, each part, nose cone to engines, hits a different note. If you’ve built a few already, you’re ready to compose something messier, harder, way more intricate than before. The challenge isn’t just adding pieces; it’s making them work together without fighting each other or throwing off your center of gravity. That’s where the actual puzzle lives. You’ll troubleshoot. You’ll iterate. And yeah, it gets fun.
Try multi-stage rockets or add complex control systems.
Performance Optimization: Your rocket’s like a race car, you want it light and sleek, which means cutting weight wherever possible. Swap in lighter materials. Smooth out the aerodynamics (drag eats fuel fast). Every pound matters, and it’s dramatic how much. The less mass you’re pushing through the atmosphere, the faster and farther it’ll go, and you’ll burn less fuel getting there. That’s the whole game.
Trim any unnecessary parts, and every gram counts.
Community Resources: Sometimes you just need another perspective. The community’s got answers, forums and video tutorials are packed with advanced tips that’ll save you hours of digging. You’ve probably scrolled past these threads before without realizing what’s there. Tap into it. Real people sharing real solutions. That’s the stuff that actually sticks.
Look for discussions on how to make rocket in infinity craft. You’ll find a wealth of ideas and solutions there.
Pro Tip: Keep experimenting. The best designs often come from trial and error.
Ready for liftoff
Building and launching a rocket in Infinity Craft gets pretty exciting. You’ll need rocket engines, fuel, and structural components, the fundamentals, but once you’ve assembled everything, placement matters just as much as having the parts. Set the rocket on a launchpad and make sure it’s stable before you hit that button. Then the real fun starts, and you’ll watch it tear across the sky.
Add a control system to steer your rocket. Fine-tune the design by balancing weight and thrust. Remember, testing is crucial.
Start small. Those early launches’ll show you what sticks and what crashes hard, so pay attention to every failure. Follow this guide and you’ll have the data you need to iterate fast. Try different designs, mix up the configurations, test variations you haven’t considered yet, because what works beautifully for one build might explode on the next. Be ready to adapt. Every test is feedback, not defeat.
Have fun and let your creativity soar!
 Ask Brenda Grahamandez how they got into ai and machine learning insights and you'll probably get a longer answer than you expected. The short version: Brenda started doing it, got genuinely hooked, and at some point realized they had accumulated enough hard-won knowledge that it would be a waste not to share it. So they started writing.
What makes Brenda worth reading is that they skips the obvious stuff. Nobody needs another surface-level take on AI and Machine Learning Insights, Zillexit Cybersecurity Frameworks, Gadget Optimization Hacks. What readers actually want is the nuance — the part that only becomes clear after you've made a few mistakes and figured out why. That's the territory Brenda operates in. The writing is direct, occasionally blunt, and always built around what's actually true rather than what sounds good in an article. They has little patience for filler, which means they's pieces tend to be denser with real information than the average post on the same subject.
Brenda doesn't write to impress anyone. They writes because they has things to say that they genuinely thinks people should hear. That motivation — basic as it sounds — produces something noticeably different from content written for clicks or word count. Readers pick up on it. The comments on Brenda's work tend to reflect that.
Ask Brenda Grahamandez how they got into ai and machine learning insights and you'll probably get a longer answer than you expected. The short version: Brenda started doing it, got genuinely hooked, and at some point realized they had accumulated enough hard-won knowledge that it would be a waste not to share it. So they started writing.
What makes Brenda worth reading is that they skips the obvious stuff. Nobody needs another surface-level take on AI and Machine Learning Insights, Zillexit Cybersecurity Frameworks, Gadget Optimization Hacks. What readers actually want is the nuance — the part that only becomes clear after you've made a few mistakes and figured out why. That's the territory Brenda operates in. The writing is direct, occasionally blunt, and always built around what's actually true rather than what sounds good in an article. They has little patience for filler, which means they's pieces tend to be denser with real information than the average post on the same subject.
Brenda doesn't write to impress anyone. They writes because they has things to say that they genuinely thinks people should hear. That motivation — basic as it sounds — produces something noticeably different from content written for clicks or word count. Readers pick up on it. The comments on Brenda's work tend to reflect that.